
Rough mixes are so important. The client leaves with a rough, maybe pops it on in the car on the ride home, and that’s the moment they determine if it was a good session or not. And then they live with the rough mix for a few days, or maybe even weeks if there’s a chunk of time between sessions, either hating it or falling in love with it. And if you get to mix the project, they might tell you, “Make it like the rough, just better,” or if you’re not mixing it, then some other guy hears it… and judges you by it.
Sometimes you get a good chunk of time to assemble a good rough mix. Often it’s whatever you’ve got up and you just have time to bounce it.
Back in my analog days I had a few tricks such that even during an overdub, the rough mix coming off the board sounded good and big. I’ve got a rough mix trick for you all today that takes a little bit of a setup, but once you throw it into a template, you’ll use it all the time. You might even use it for a finished mix. It’s fast, really easy, works for literally anything, and gives you a lot of loudness and control.
This is, by the way, a bit of a repeat of something I wrote a year ago. I thought it was worth revisiting because it’s that good a tip and I’m going into more detail.
The CLEAN Bus
The first step is to stop routing your channels to the Stereo Output. Instead, create a bus (stereo, please) and route all your channels to that. Call that bus CLEAN, and then route that to your Stereo Output. So, now everything is feeding into the CLEAN Bus. And anything you add to the mix, route it to CLEAN and not the Stereo Outputs. An added advantage—if you’re adding tracks, route THAT through the Stereo Bus and then you can use CLEAN as a master to control the music levels.
To reiterate:
All the Channels—>CLEAN Bus—>Stereo Outputs.
Now, set up two additional buses on the CLEAN Bus. They should feed PRE FADER. Label these two buses PUNCH and SQUISH. I sometimes call the SQUISH Bus the CLIP Bus.
The PUNCH Bus
I have to say that I only use Korneff plugins and a couple of Logic’s stock plugins. This is because I love our stuff, know how to work it, and I don’t like choosing between plugins, it’s a waste of time. I just pick what I know and like and go.
On the PUNCH Bus’s insert, I stick a Pawn Shop Comp. The PSC is perfect for this application. I’m looking for a lot of control on attack and release, and something that is basically really punchy, and that is the Pawn Shop.
On CLEAN, turn the send to PUNCH up to unity and bring down the CLEAN fader all the way. Slide up the PUNCH fader. You should hear your entire mix through the PUNCH Bus and through the Pawn Shop Comp.
Adjust the PSC for as punchy a sound as possible. I start with maybe 6:1 on the ratio, attack around 15ms, release pretty fast, like maybe 100ms. You should hear a lot of attack, cymbals should swish a lot, and it should sound TOO compressed.
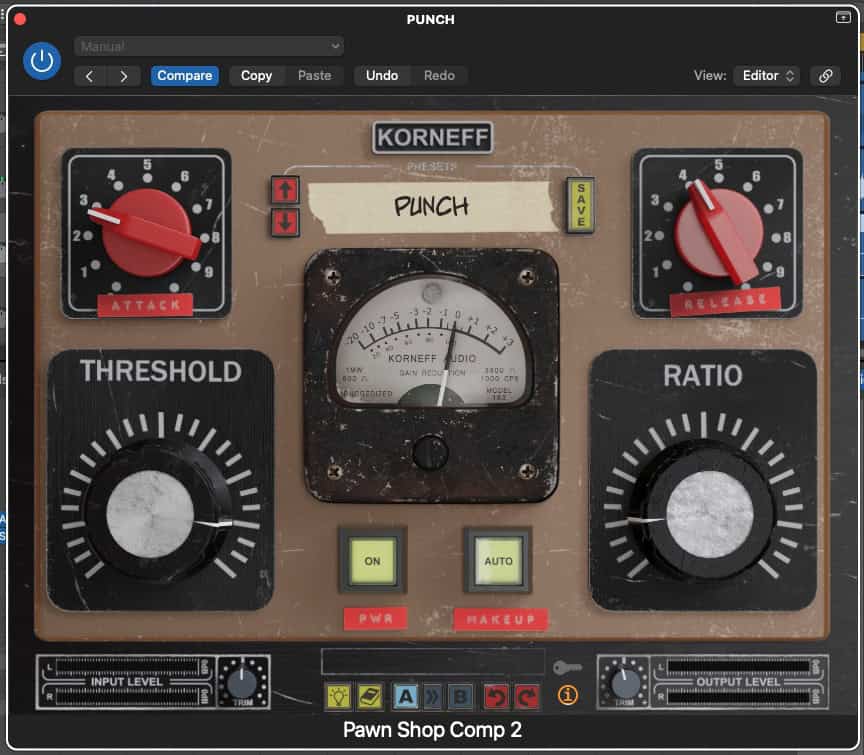
Now slide up the CLEAN fader. As you bring it up, the mix will start to get loud and, well, punchy. Get the CLEAN up to unity and maybe pull the PUNCH back a little bit. Play with these two ’til you get a sound you like. So, what you have here is parallel compression of the whole mix.
The SQUISH Bus
On the SQUISH Bus you’re going to put something that clips and saturates. Think of saturation as a mix of a limiter with infinitely fast attack and release, and adding harmonic distortion. You can use a dedicated saturator. I use either the SITRAL W295 Klangfilter or the Echoleffe, depending on if I want a solid state saturation or a tape saturation. I usually use the Echoleffe, so that’s what I’ll explain here.
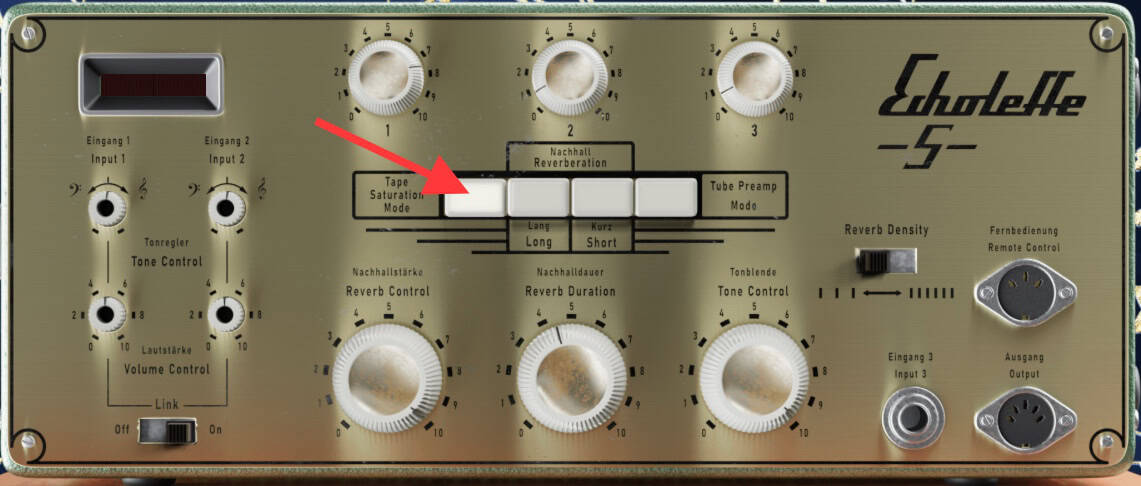
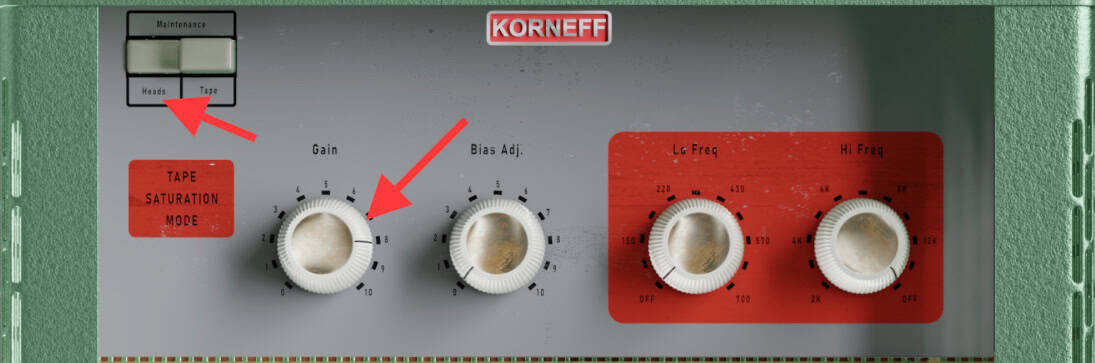
Stick an Echoleffe on the insert of the SQUISH Bus, and switch the Echoleffe over to Tape Saturation Mode. Slide down CLEAN and PUNCH, and bring up the SQUISH Fader. Click on the Korneff nameplate to go to the back of the Echoleffe.
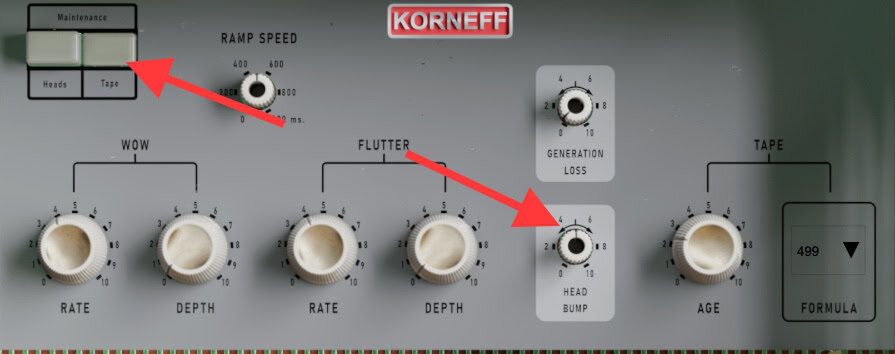
I set the Echoleffe up to sound a bit grindy, but not too much. Usually I just turn up the GAIN. If you mess with BIAS it can turn into a fuzz box, and I don’t usually want that. You can also click on TAPE and maybe adjust the tape age a bit, or the HEAD BUMP for a little more low end.
What is happening is you’re adding a layer of tape compression to your mix. Parallel saturation. This will be subtle-sounding, but when mixed in…
Now, bring up the CLEAN Fader and listen for a bit, then bring up the PUNCH. It should sound HUGE, and you will have to probably do something to drop the Gain at your stereo bus, like use a Gain plugin or some such.
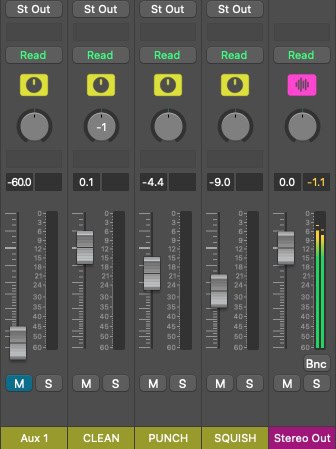
By adjusting the three faders, you can get a lot of different variations on your mix. You don’t need much of PUNCH and SQUISH to make a big change to the mix. There should be a big increase in loudness, bigness and polish. If there’s something in the sound you want to stand out, pull it out of the CLEAN Bus and send it right to the Stereo Outputs.
I usually set this up at the start of a mix during my “Diagnostic” pass, and I listen for which instruments seem to “like” compression or saturation, which instruments get lost, which get too big, etc. If things get a bit midrange-heavy, a broad cut of a few dB in the mids on either the SQUISH or the PUNCH can clean that up.
And there ya go. Killer rough mix with 5 minutes of setup and a few plugins.