
The Shure Level-Loc was designed as a limiter, and a limiter is basically a compressor with a high compression ratio and a fast attack and release. The difference between the two is more in the use than the semantics.
But the Level-Loc in modern usage is seldom used as a compressor; it’s thought of as a saturator or a “character box.” Let’s get it to work like a compressor, like Steve Miller did when he cut the vocals for Fly Like an Eagle at his house in 1976. Here are my final settings, but it isn’t too far from where I began.
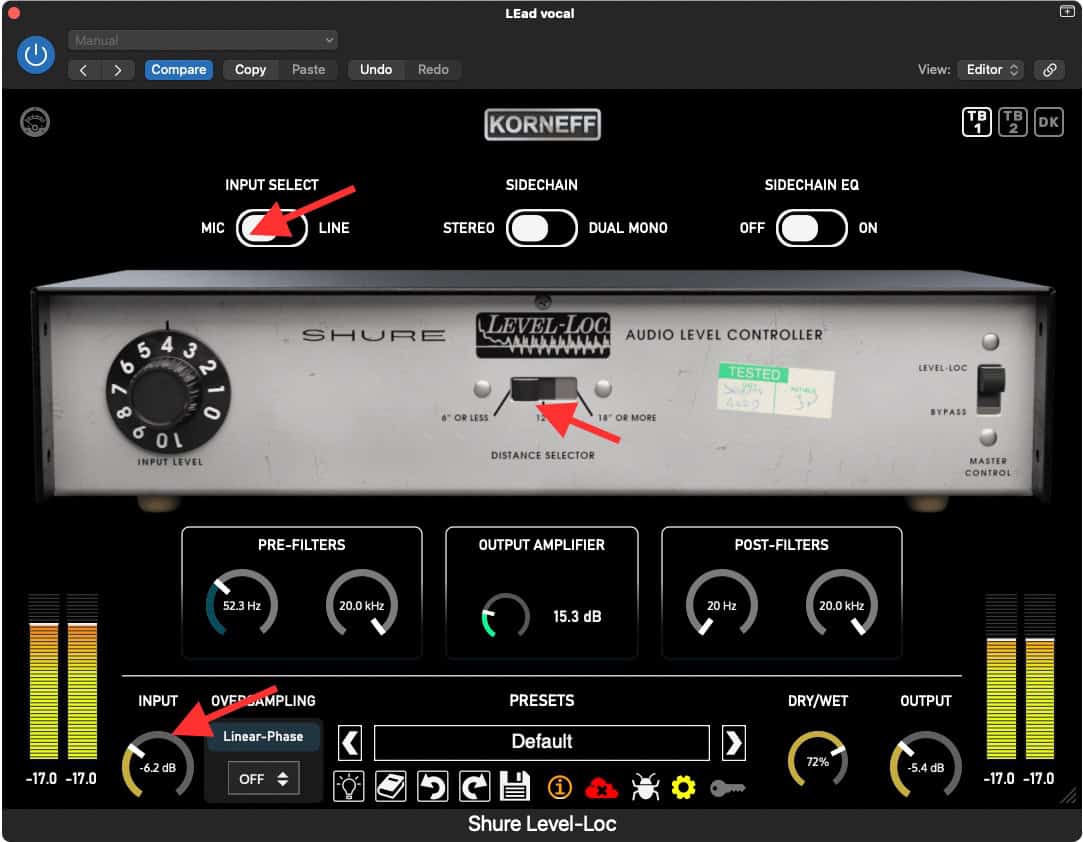
First set the INPUT SELECTOR to MIC. This reduces the input gain by -30dB, and turn INPUT TRIM down by -6dB. Doing this will drastically lower the input level to the compressor circuit, which lowers the potential of the Level-Loc to crush and saturate the signal. It will also give the INPUT LEVEL control more play and make the DISTANCE setting more useful. For purposes of this lesson, I set the DISTANCE to 6″, which sets the internal threshold high. Each distance setting lowers the threshold by another 6dB, and also changes the way the compressor sounds a bit. You might or might not notice a difference depending on your source, but you may as well experiment.
Click on the GAIN REDUCTION DISPLAY symbol to far left, and you’ll get a display.
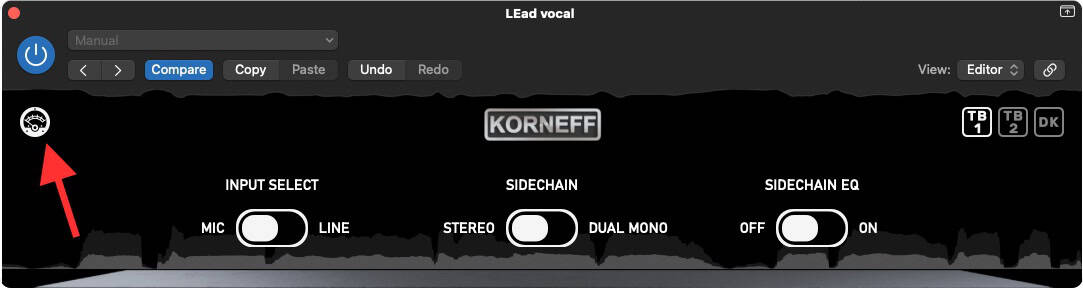
You can watch all three: Input Level, Output Level, which are on the bottom, and Gain Reduction, which is on the top. I find it most useful to watch Gain Reduction when I’m adjusting the INPUT LEVEL. If you’re seeing a lot of that Gain Reduction dark gray, you’re compressing things a lot. Back off the INPUT LEVEL, and if you need more room, turn down the INPUT TRIM some more. You basically want the quiet parts to have no Gain Reduction showing. I set this all by ear, though. And basically, what the Level-Loc will do is flatten the vocal out, exactly what it was designed to do originally.
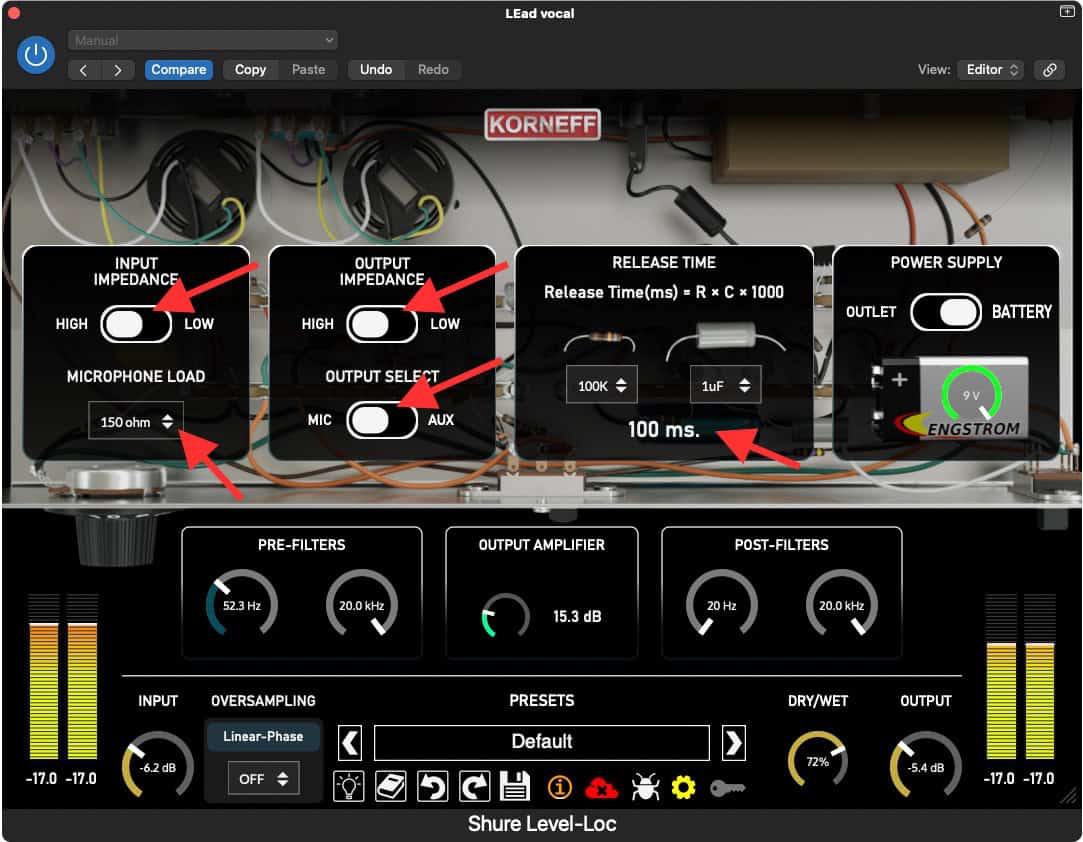
Press the KORNEFF NAMEPLATE to open the top of the plug-in to access more controls. You’ll see some INPUT IMPEDANCE controls.
On the original hardware unit, impedance matching would have been critical. Why?
Because of transformers. Both mics and consoles back then used transformers on the inputs and outputs. Mismatching impedance when plugging a mic into a preamp could drastically change the power output and the frequency response of the microphone. Miller cut the vocals on an Electro-voice RE-20, which is a dynamic mic and would be VERY affected by impedance mismatch. Miller would have adjusted the Level-Loc’s input to match the the RE-20’s 150 ohm output impedance. SO, he would have switched in between HIGH and LOW and picked whatever sounded loudest and clearest. You can switch between these settings. You’ll notice a change in level, and depending on the source, a change in frequency response—you’ll here is as a slight pass filtering of the lows and highs. Don’t sweat it if you switch this and don’t hear much of a difference.
MICROPHONE LOAD functions like a pretend microphone. You can flip these around and see what difference it makes. Again, don’t worry if you don’t hear much of a difference.
OUTPUT LEVEL has two choices MIC or AUX. Why?
The hardware Level-Loc had an auxiliary out for plugging straight into a console. The MIC out was designed to plug into a mic preamp in, so switching it to MIC sticks yet another transformer into the signal path for some additional transformer saturation if you want that.
We talked about adjusting RELEASE TIME last week. I got good results on a vocal with a release of 100ms, but a release time that short will definitely bring up breath noises. If you don’t want the, set it longer.
Last thing, and a VERY useful feature: go back to the front panel and click in the SIDECHAIN EQ.
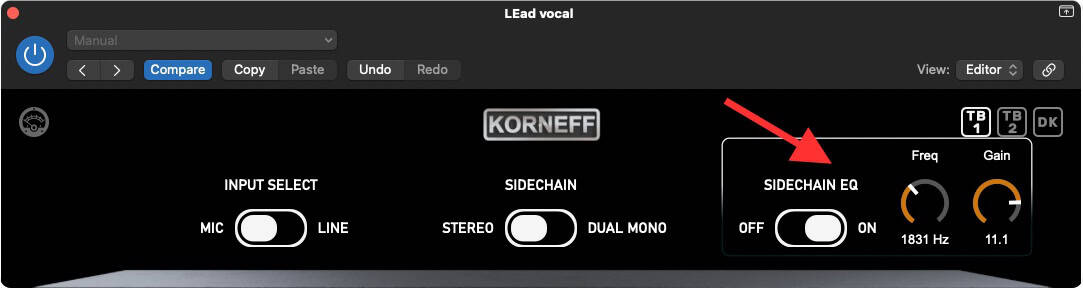
You’ll see a sweepable EQ with a wide range of frequency and gain adjustment. Now, this WON’T affect the frequency response of the signal going through the Level-Loc, but it will affect the CONTROL SIGNAL in the. sidechain. Boosting it will make the circuit more sensitive to the posted frequencies, cutting will make it less sensitive.
A typical use is to cut down in the 50-200hz area so a compressor doesn’t trigger as much on lows like the kick or a bass. I’ve been getting good results with the Level Loc by doing this:
1) Bring up the vocal track in context of the entire mix and listen.
2) Are there ranges in the vocal where it cuts through the mix too much? Certain notes that seem loud? High pitched wails or screams or nasal tonalities that sound too loud?
3) Turn the GAIN clockwise a bunch and then sweep the FREQUENCY a bit. You’ll notice the vocal sit differently in the mix as you sweep the frequency. Remember, you’re not changing the tonality of the vocal, you’re changing the responsiveness of the Level-Loc.
4) Fine tune the GAIN until the vocal is where you want it in the mix.
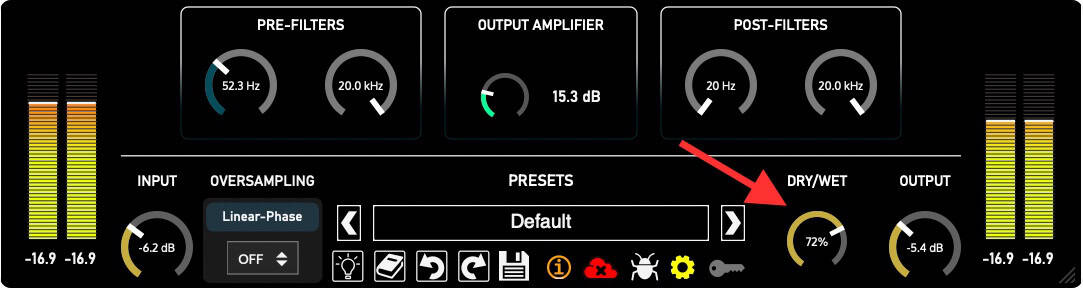
Note that I used the WET/DRY Blend to reduce the overall effect. The Level-Loc almost always benefits from being used in parallel.
You can also compress bass this way, or really anything.
In the next lesson, we’ll look at some noise making with the Shure Level-Loc.