Use the Pawn Shop Comp Backwards
If you've been using our Pawn Shop Comp, you might be using it backwards. And if you haven't got the PSC yet, click here, get the demo and follow along with this blog post: you'll learn some good stuff.
A few days ago, Dan and I were chatting about audio (whatever), and he described in detail his approach to using the Pawn Shop Comp. It's completely opposite to the way most engineers probably use it. And since Dan built the PSC, it certainly makes sense that he knows it better than anyone. He also uses it a lot — typically it's on 40 to 70% of the channels in his mixes.
So, this is Dan's approach, 180 degrees in the other direction, and I'll tell you exactly what he does.
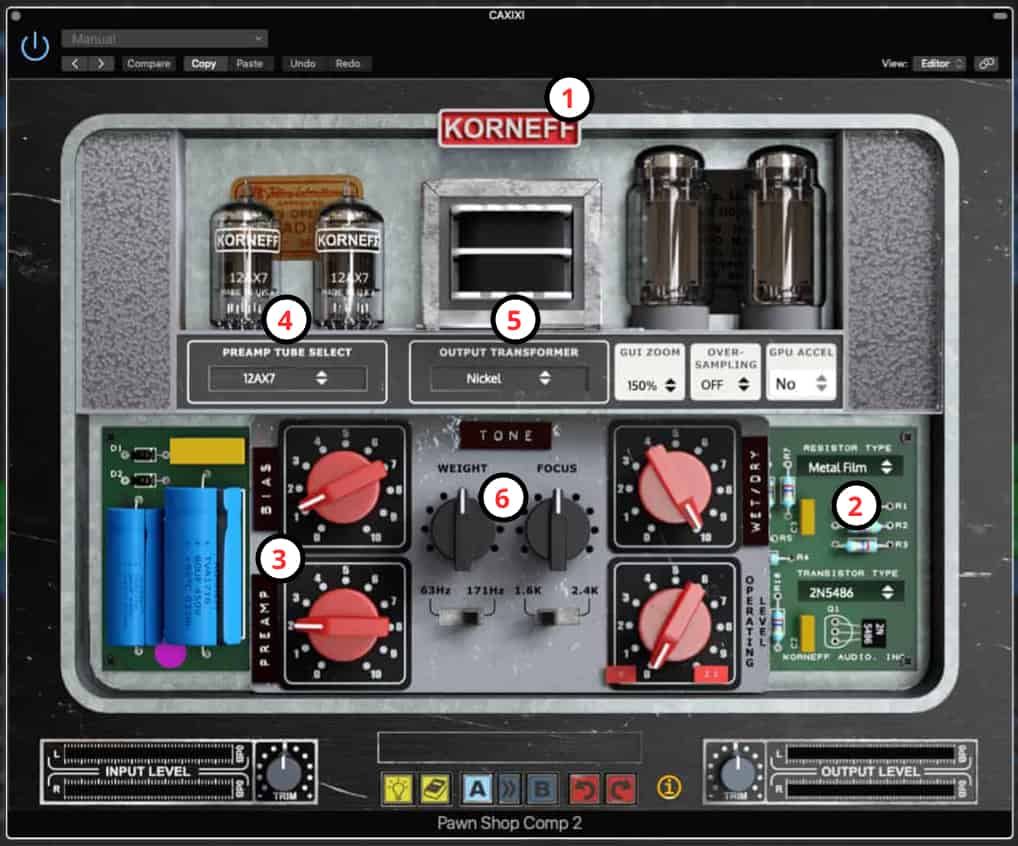 So much to tweak, so little time!
1. Flip it Around to the Other Side
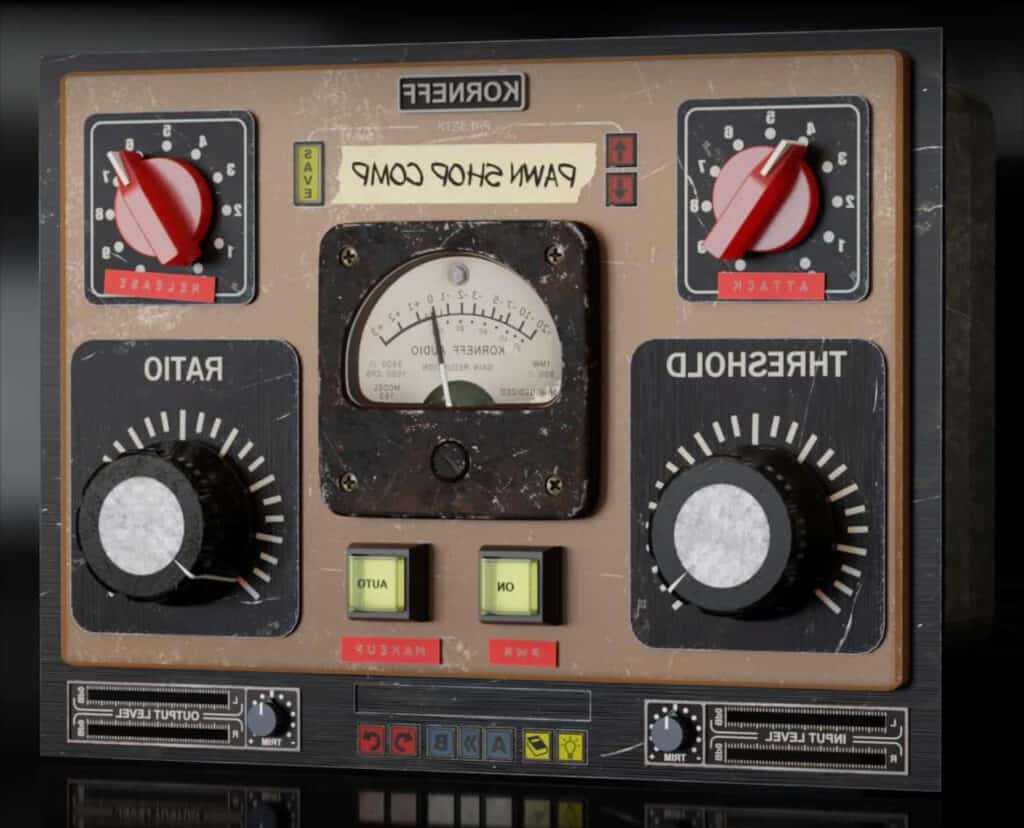
The first thing Dan does is hit the nameplate and flip the Pawn Shop around to the back. He starts off completely ignoring the "comp" of the Pawn Shop Comp. Instead, he starts by adjusting the back, thinking of the PSC as a channel strip rather than a compressor. And that makes sense, because the preamp and most of the back panel goodies are pre-compressor in the signal flow.
2. Goof Around with the Resistors
On the back panel to the right, there are switchable resistors. Just by swapping in different resistors, you can adjust the high end frequency response and some of the saturation characteristics of the PSC. Dan and I both have an "old time" engineering philosophy, which is, "Start by getting rid of what you don't like." The resistors allow you to subtly tailor the high end of your track before you even touch an EQ.
Metal Film resistors are modern components, and have the brightest, least colored sound. Switch to these when you need highs with a lot of sheen, such as on vocals, or ride cymbals, strings, pianos, etc.
Carbon resistors are darker, with Carbon Composite being the darkest. Use these when you want to round off the highs. They work well to tame nasty cymbals and high hats, smooth out vocals that were cut on cheaper condenser microphones, which can often make them sound spitty, take some of the high end "chiff" off electric and acoustic guitars, etc. You'll also tend to get a different flavor to the saturation — more on this as you read...
3. Play with the Preamp
Off to the left is the PREAMP GAIN. You'll notice that it is already turned up a little bit even before you start to adjust it. Take this as an invitation to adjust it some more.
As you turn it up, you'll start to overdrive the preamp a bit. Depending on the signal you're passing through the PSC, you might not hear much of a difference, but the more clockwise you go, the more you'll hear it, as you push the preamp into saturation and eventually distortion.
Quickly explained, when you turn up the gain too much on something like a tube or a transistor, you generate harmonic distortion. And to our ears, a little harmonic distortion sounds good - we'll call this saturation. And, sometimes, a hell of a lot of harmonic distortion, like when you overload a guitar amp, sounds good. We typically call this distortion... uh... distortion.
Think of it like toast: getting the bread a golden brown is saturation, and burning it a bit is distortion. In audio, we usually prefer the toast a little brown — it's better than white bread.
What the saturation is adding is, essentially, high harmonics that are mathematically related to the signal passing through the preamp. An easier way to think of it: saturation is kind of an upper midrange to super high end equalizer. SO... turning up the PREAMP gain is like making the toast golden brown by adding high end.
Whatever. Saturation of vocals gives them a beautiful sweetness, or a nasty ass snarl, depending on your settings. On things like drums, saturation sort of acts like a compressor with an infinitely fast attack, and it rounds out the transients. Cymbals will go from a sharp "ting" sound to a smoother "pwish" sort of sound. Same thing happens on guitars and snare drums. Careful with a lot of saturation on a kick drum — too much and it will lose some of its punch in the mix.
Now, the PREAMP BIAS control... this is sort of like "What if we plugged the toaster directly into the power grid." Not really, but, kind of.
Bias, simply put, adjusts how well something works. If you make something work harder than it is designed to work, you'll get a lot of power out of it, but the results can be unpredictable, and in the real world, you'll burn it out.
But with the PSC, playing with PREAMP BIAS won't blow anything out, but if you crank it up you can get insane amounts of distortion. Use PREAMP BIAS to get fuzz on basses, or add additional distortion to guitar tracks, or make a vocal sound like Satan backed a master truck over the singer's face. Whatever - play with it! It's fun.
Don't be afraid to add saturation to any and all of your channels. The BIG SECRET to those amazing sounding vintage records that you love is that there is saturation ALL OVER THE PLACE. I used to hit the 24 track tape super hard when tracking, basically adding tape compression to everything (tape compression = fancy word for saturation), and then the individual channels might be driven a bit too hard (if it sounded good). Some audio channels click and sound awful when you push them too hard. I loved Trident consoles but if you overdrove the mix bus even a little it would sound like shit. The SSL and Neves not so much). And then there would be more damage done by compressors, mastering, etc. There's a reason Dan puts the PSC on so many channels, and this is it.
4. Tweak Them Tubes!
As he messes with the PREAMP, Dan also plays with the tubes — there are three different models to choose from. Each has its own gain structure and saturation characteristics.
The 12AX7's are the default, and they have a nice distortion to them, which is why they're often used on guitar amps. The ECC83's have a lot more gain, and they respond to an instrument's frequency response very differently than the 12AX7's. Switch between the two and see what you like better. The differences in sound will become much more pronounced the more gain you have.
The 5751 tubes have much less gain, are much rounder in the high end, and sort of smear the transients out. Switching to these will lower the gain through the PSC and give it an overall more vintage sort of vibe. Think vocals that need a bit of taming, synths that are harsh and remind you of your mom yelling — 5751, mom!
5. Transformer Time!
Transformers are a HUGE part of the sound of a piece of analog equipment. It's not uncommon for vintage mic preamps to have loads of them — my Quad Eight MM61 mic pre's have a whopping EIGHT transformers per channel, and those transformers are intrinsic to the sound of them.
Without going into a lot of detail, transformers can saturate like a preamp can, but the saturation is very different. The harmonic distortion added is at lower frequencies, and the more you clobber a transformer.... this is hard to describe... it sort of makes the signal kind of slower and mushy? I can't describe it really, but you can definitely hear it.
You can't directly overload a transformer really - you couldn't on vintage gear really either. If you're running a lot of gain through the system, transformers will overload. But the overload/saturation characteristics are very frequency dependent. On the PSC, as you play with preamp gain, you'll automatically affect the transformers.
Dan uses the transformers to contour the bass response of the PSC. Now, depending on the amount of gain you have happening and the type of instrument you're processing, you might find it very difficult to hear the effect of the transformers. I always switch them around, and sometimes it makes a difference, and sometimes I'm just flipping shit around doing nothing. It's always worth a try, though.
NICKEL - this is the most modern sounding of the transformer types, the least colored. This, with Metal Film resistors and the preamp set as low as possible, will give you a very clean, wide sound. On things that you don't want colored, Nickel is your choice.
STEEL - steel transformers pull warmth out of the signal, and if you overload it, it tends to tighten things up and make things a bit more.... forward? Bright? Again, hard to describe. I switch to Steel when I want things to cut a bit more in the mix. Flubby kick? Try Steel. Shitty drummer? Fire him!
IRON - Iron is probably the easiest to hear and has the most pronounced effect. I hear it as a lift to the bass and a thickening of the lower mids. Bass is a natural use, as well as on guitars and vocals.
So far, we've done all sorts of processing without touching an EQ or a compressor. In effect, we are "custom building" a channel to fit our signal by switching around components and adjusting gain, very much the way a console designer would develop the sonic signature of a recording console, or a preamp. The PSC backside lets you pretend you're Rupert Neve or some guy like that. Now, to be clear, you aren't Rupert Neve, and the PSC gives you a lot of control, but not the control that an actual console designer might have. However, in terms of what you can do within your DAW and without getting electrocuted, the PSC is amazing.
6. EQ EQ
This blog post is getting too long - I'll have to make a CliffNotes version of it, but we are almost done.
The PSC has two bands of EQ built into the PREAMP. Both EQs are wide bandwidth peaking EQs, with response curves similar to console EQs from the late '60s and early '70s. They're very smooth, they don't have a huge amount of gain, and they sound kind of like a cross between an old Neve EQ (like a 1073) and a Quad Eight or a Sphere or an Electrodyne EQ — or something from the '70s, made on the West Coast of the US.
Dan and I both think of them more as level controls than EQs. What I mean by this is that if you turn up WEIGHT, you'll lift up a pretty large area of the bottom end. You can't use WEIGHT to really pick out the thud of a kick, but if the entire kick sound is anemic and weak down there, WEIGHT will add... uh, weight. Cutting it gets rid of mud. There are two frequencies to choose from. We usually switch between them and go with what sounds best.
As your mix builds up, remember that you can go to WEIGHT on specific channels and pull some bass out of things to keep the low end from getting flabby — I'm looking at you, guitars and tom toms and drum room sounds.
FOCUS is a midrange lift. Now, the area that it covers, Dan has noticed, is an area that a lot of engineers are scared to EQ. And rightly so; it's dead in the middle of things and too much in there sounds honky and stupid. But FOCUS is very smooth, doesn't have a lot of gain available, and it works really well to sort of push a track out in the mix or pull it back. Again, we think of it as a level control, and not as an EQ.
WEIGHT and FOCUS are really well named. Dan's idea.
AND WE ARE DONE
Quick recap — the CliffNotes version: Switch around to the back, try different resistors, adjust with the preamps and the tubes, experiment with the transformers, dial in the WEIGHT and FOCUS. Get it sounding good and then...
Switch around to the front and mess around with the COMPRESSOR!!!!
GAHHH!!!! More controls!! Time for a bath!