
Amplified Instrument Processor 01 - Initial settings and using the Proprietary Signal Processing
The Amplified Instrument Process, or AIP, has a ton of functionality and options spread across its front and back panels. It's easy to look at this thing and think, "Where do I start??"
In the next few emails, I'll show you how we, at Korneff Audio, approach using the AIP and I'll explain the controls along the way.
Where to put it
First thing: we tend to put the AIP on groups, or submits. Typically I have one on the drums, one on the guitars, one on the vocals, one on the keys, etc., and one on each of the reverb returns. I'll do this in addition to putting them on individual tracks, but I'll always grab the groups. Except the bass. I put the Pawn Shop Comp on the bass!
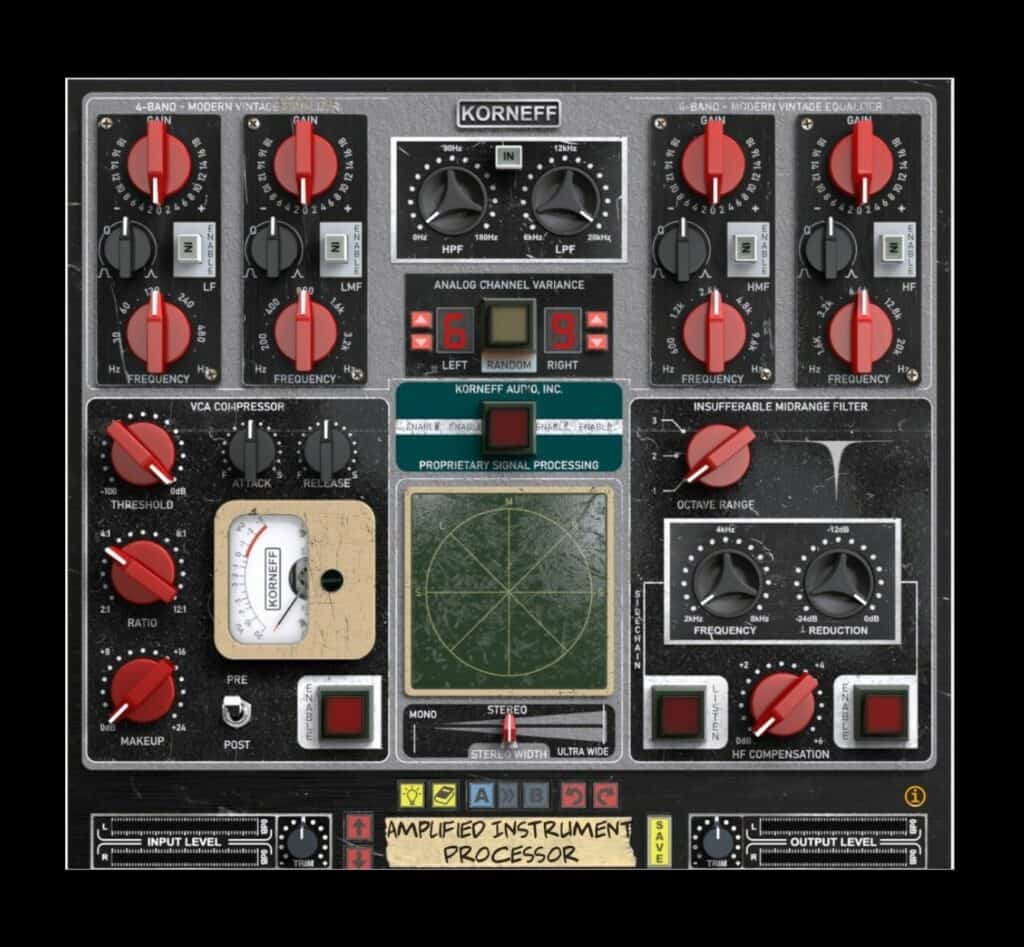
The AIP is misnamed. It isn't just for amplified instruments. It is really a channel strip. Think of it as a channel strip.
Where to start - with the PSP
It's tempting to grab the EQ, or the compressor, and start moving things around, but we usually start with the PSP, the Proprietary Signal Processing.
Why?
Because the PSP sets up how the entire plug-in will sound. Think of it like you're about to mix, and you have a choice about which console you're going to mix on. Wouldn't that decision come before you decided anything regarding EQ or compression? That's the thinking behind the PSP.
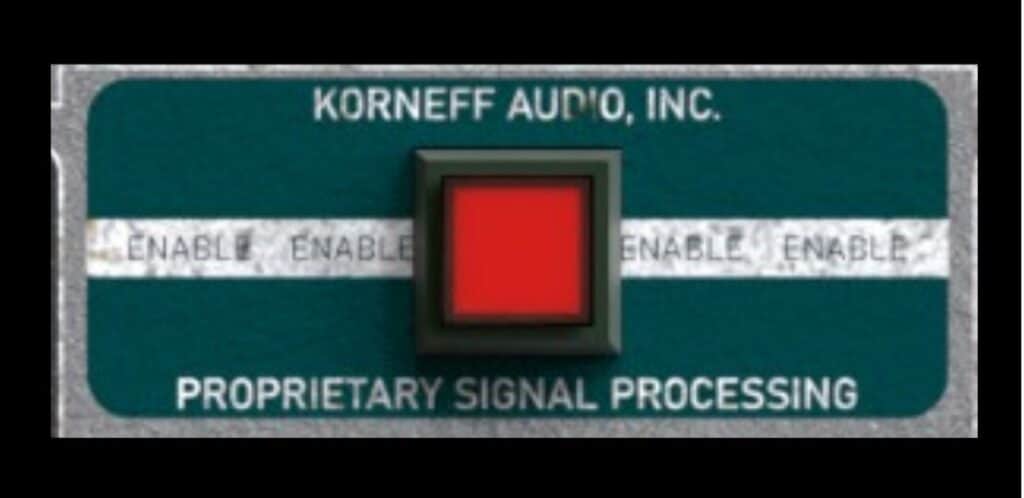
So, press the big red button in the middle, then hit the Korneff nameplate to go around to the back panel.
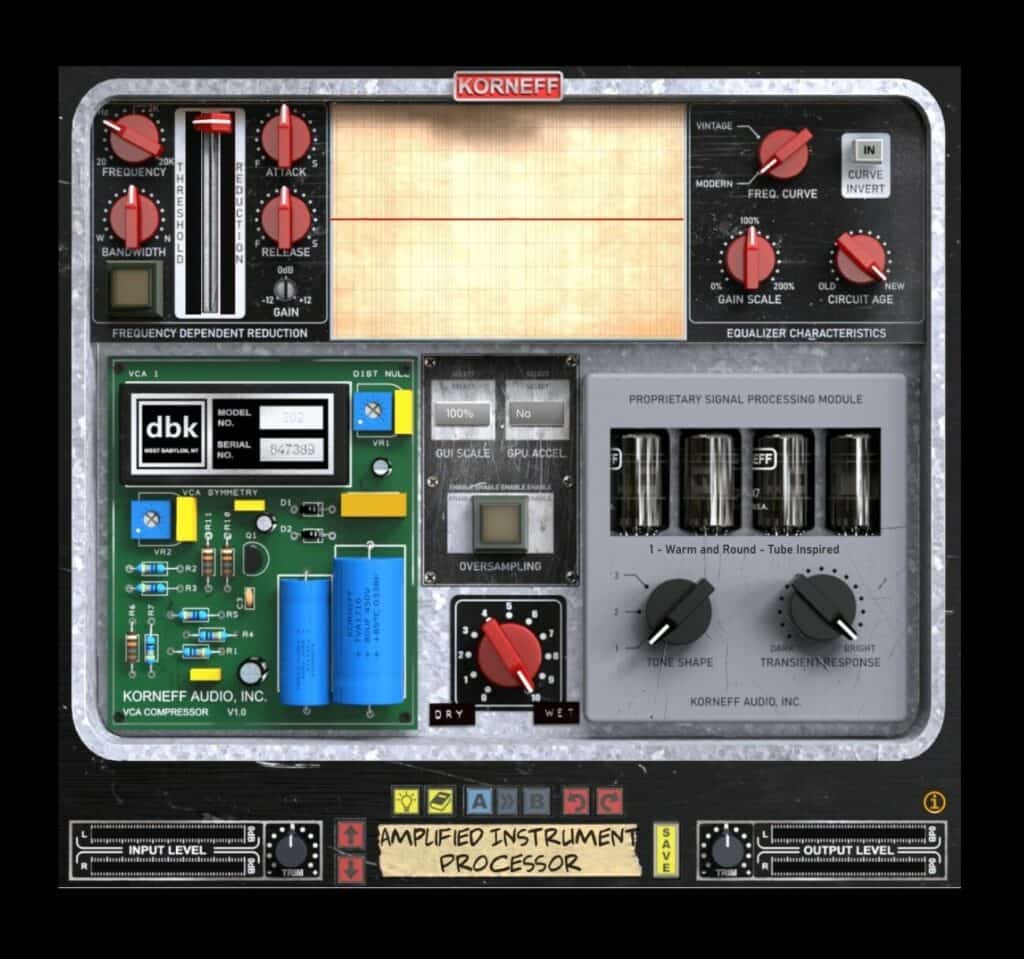
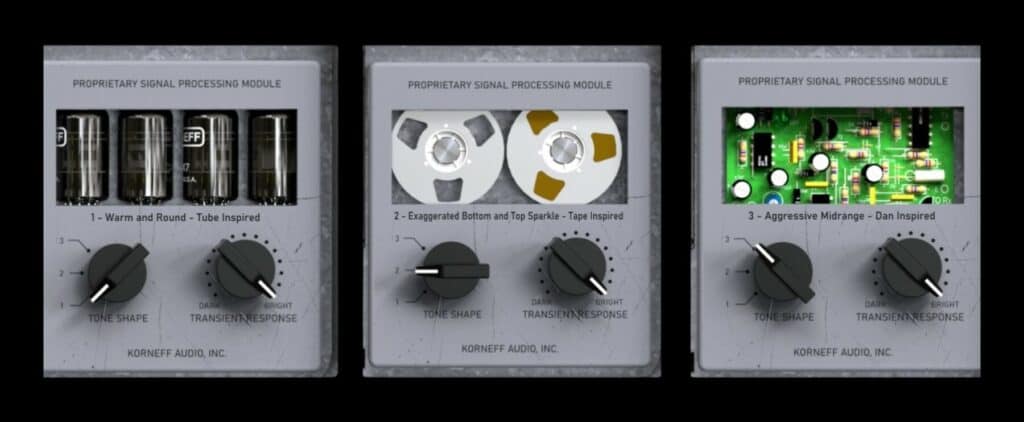
There are three main settings on the TONE SHAPE control:
Tube: is a warm, rounded setting. If a track sounds harsh or thin, this is usually what I choose. This will add a touch of harmonic distortion for warmth, and the slightly slower slew rate of tube components takes the edge off transients.
Tape: emulates the response curves of a classic multitrack tape deck. The bottom end will get a bit fuller, and the highs will gently lift. I put this on drums, guitars, keyboards, and synths to give them more size. Tape also has a smoothing effect on transients (tape compression emulation).
Solid State: tightens up transient response and pushes the midrange out. I often put this on lead vocals, or really anything I want to have punch through a bit. This setting emulates the sound of recording consoles from California that were popular during the 70's. The transient response on this setting is very fast, as these consoles had a lot of headroom and fast slew rates.
A few guidelines in here: I tend to use the Solid State setting sparingly, mostly using it to bring attention to tracks that I want to feature in the mix. Yes, of course you can use this setting on all of the AIP instantiations you have on your mix, and the mix won't sound harsh or too forward; it will sound great and somewhat like it was mixed on an AIP with its letters rearranged into a different order (hint!).
Once you select a setting, you might want to work with the TRANSIENT RESPONSE control.
Slew rate, in simple terms, is how fast a piece of gear responds to changes in power levels. This is a GROSS simplification, but it is a good start for your thinking on the topic, and on how this control works on the AIP.
A fast slew rate means the gear can reproduce the changes in a waveform very quickly and accurately. Slower slew rates have "inertia:" they can reproduce the waveform, but if the changes are fast and large, it's a little slow in responding.
This is REALLY subtle. I've never been in the studio where someone said something like, "Jeez, Luke! Can't you increase the slew rate on the snare track? You're killing me here." But I've been in lots of sessions where we've swapped around different mic preamps, and really, what we were listening for was the accuracy and tightness of something with a fast slew rate.
Slew rate is a subtle thing that makes a big difference that isn't a big difference. Does that make sense? Maybe not, but keep this in your thinking and you'll eventually be able to hear it (or at the least convince yourself that you are hearing it!).
Back to the control: as you turn it clockwise, the transients will smear a bit and soften. This is a good control to crank up on spitty sounding vocals, percussion or keyboard parts that hurt, or anything that just has too much "cut" in your mix. I often run all the background vocals through the AIP set to tube, then I turn up the TRANSIENT RESPONSE control to tuck them into the mix a bit. Also, don't forget you can automate this control for really subtle changes that you'll be able to hear but probably no one else (I still recommend doing this if it makes you happy).
I find that if I set my PSP settings correctly at the beginning, I've already improved my mix, and overall, I've decreased my workload a bit.
Notice, on the signal flow, that the PSP is right after the Input Trim. This means that if you turn up the trim, you'll drive the PSP harder, and it will overload, and saturate in a manner similar to its analog inspiration.
So, perhaps instead of adding highs with an EQ, think about turning up the Input Trim, increasing the harmonic distortion of the PSP and getting the highs from the added harmonics. How's that for a cool trick?